Friday, 14 September 2012

How to Prepare Concrete for Waterproofing |

Waterproofing :

Waterproofing concrete is important to protect the surface from excessive moisture. When water seeps into concrete, the concrete expands and contracts due to cycles of freezing and thawing. Cracks and holes may form as a result. Waterproofing will help protect against this problem. Waterproofing sealant cannot be applied to concrete that has not been properly prepared. Preparing concrete for waterproofing is an important step in ensuring that the waterproofing sealer works properly.


Instruction(Preparation for waterproofing):

  1. Allow new concrete to cure for a minimum of seven days before waterproofing. Repair any damaged areas of the concrete. Fill in cracks or holes with a concrete patching compound.
  2. Scrub the concrete with a dry, stiff brush to loosen any lodged dirt or debris. Follow up by sweeping the concrete with a broom. If you're waterproofing concrete walls, use the soft brush attachment on a vacuum cleaner rather than a broom.
  3. Simple way , with the help of chipping hammer remove spawl or spall i.e (  However, all concrete construction has one problem in common. A flaking, crumbling part of the surface, called a spawl or spall, is an early warning sign that concrete repairs are required. Repair a concrete spawl immediately to minimize the extent and expense of the work.) than a thin plaster (2-4mm) is needed for closing small holes and making surface smooth as shown in pic 1 and 2.  This method I used in Novotel and Ibis Hotel.


    after repaired spawl pic 1
    pic2

How to Repair a Concrete Spawl:

Concrete spawl
Concrete is an inexpensive construction material that has been used for more than two thousand years. Domes, columns, beams, slabs, sidewalks and backyard patios are made of concrete. With proper care and use, concrete construction can last several lifetimes. However, all concrete construction has one problem in common. A flaking, crumbling part of the surface, called a spawl or spall, is an early warning sign that concrete repairs are required. Repair a concrete spawl immediately to minimize the extent and expense of the work. Choose repair materials to match requirements of the installation.


Instruction: (Causes and Repair)

  1. Determine the cause of the spawl. Moisture is the most common problem. Other causes include impact, overloading, exposure to chemicals or too much water in the original concrete mix. Eliminate these problems wherever possible to extend the life of the repair. Test new concrete at the time of placement to confirm that the mix contains the specified amount of water.

  2.  Remove the damaged concrete. Establish a perimeter around the damaged area by cutting into the concrete at the depth recommended by the manufacturer of the repair material. Use a saw specifically designed for cutting concrete, such as a Hilti handheld gas saw. .

  3. Clean the exposed surfaces. Sandblast or power wash concrete and reinforcing steel to remove all loose materials, dust particles and rust. Vacuum clean.

    Filling a small crack with pourable grout:

    1.  Cut the tip off the grout container to create a hole a little smaller than the width of the crack. Pour in the grout to fill the crack.

    2. For deep cracks, pour in the grout one layer at a time and allow complete drying between layers.

    Filling a large crack:

    1. For cracks wider than about 1/2 inch (12 mm), use a mason's hammer and chisel to cut the crack so it is wider below the surface than at the surface, a process called undercutting. Undercutting prevents the patchi material from being forced out in response to temperature changes.

    2. Mix vinyl concrete patcher with water as directed. Press the material into the crack with a mason's trowel in layers no more than 1/4 inch (6 mm) thick. Allow each layer to dry completely before applying the next.

    3. Using a steel trowel, wood float (a wood block with a handle), broom or brush, finish and texture the surface to match the surrounding area. A steel trowel gives the smoothest surface; hold it flat and use a swirling motion.


Using DPC ( Damp Proof Course ) for waterproofing :

1) Waterproof, dampproof, ageing-resistant, leakproof 
2) No flowing at highest temperature and no crack at  

 A damp proof course ( DPC ) is a physical barrier inserted into the fabric of a building to stop water passing from one place to another. 

This can be on a horizontal plane, stopping water rising up from the ground by being sucked up by the dry masonry above, or vertically to stop water passing from the outside of a building, though the masonry, to the inside. 

DPC's have taken many forms through the ages and one of the earliest forms was to use a layer of slate in the construction.

Slate is still used but the less expensive plastic version ( below right ) is now more widely used. 

Benefits of DPC :

  • Fully Inert & Unaffected by LOSP Timber treatments
  • High Strength
  • Extreme Durability


2nd Coat of DPC
1st coat of DPC

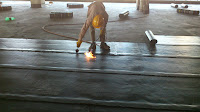
Fixing Membrene

Using DPM ( Damp Proof Membrane ) for waterproofing :  

DPM is a liquid applied damp-proof membrane (DPM) that can be used to resist the penetration of gases, vapours and liquids.  It is based on a blend of polymers which provide integrity, elasticity and toughness to the formed film. Drybase Liquid Applied DPM is supplied ready for use and is applied in two coats by brush, roller, or airless spray.  

Because Drybase Liquid Applied DPM does not contain any bitumen it will not give off the "bitumen odour" that is associated with certain bitumen-based products - resulting in fewer complaints from homeowners.

Note- Before fixing membrane need dumer/primer as shown in pic 1.1 and 1.2

Benefits of DPM :

  • Easy to apply

  • Supplied ready for use

  • Available in black or white                                                 

  • Gas barrier (radon, carbon dioxide, methane)

  • Water-based

  • Quick drying

  • Damp-proof barrier

  • Bitumen-free, low-odour formulation

Primer pic1.1
pic 1.2

Fixing membrane in Health Club